Sooner or later most of us at least think about opening some of our services up to the internet and there is plenty of reason that lead to this idea.
Did you spin up a shiny new file sharing service like
Gokapi and want to share some snapshots from last weekend’s birthday party or is it just your neat
Wiki you put hours into and can’t wait to share your knowledge with others?
IMHO you should always be mindful about publishing things to the internet, be aware of the risks that come with it and prefer accessing your services through a VPN like
WireGuard.
Of course there are plenty of counter measures you should take - IP masking (e.g. Cloudflare Proxy), DDoS protection and access restriction to name a few - but an element of risk remains.
Wouldn’t it be great to add another layer of security to your services? That’s where
Authelia comes into play.
A simple way to add an authentication and authorization portal to your applications.

Why Authelia? #
Security usually means things get tricky to set up and harder to use, this is not the case with Authelia. The setup process is straight forward, configuration is easy through YAML files, and it really is “blazing fast” as stated on the project website. Authelia just works and never failed me.
What is Authelia? #
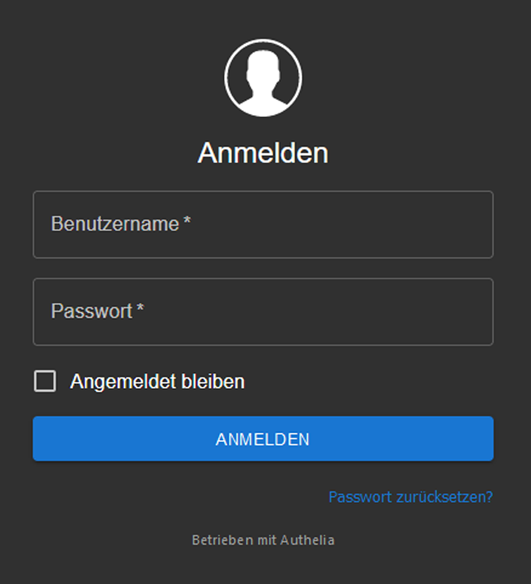
Authelia is a lightweight open-source authentication and authorization server and portal fulfilling the identity and access management (IAM) role of information security in providing multifactor authentication and single sign-on (SSO) for your applications via a web portal.
It acts as a companion for common reverse proxies.

Installation #
Installation via docker-compose is quite easy, just use the following docker-compose.yml.
version: '3.3'
services:
  authelia:
    image: authelia/authelia
    volumes:
      - ./config:/config
    ports:
      - <PORT>:9091
    restart: unless-stopped
    # healthcheck:
      # disable: true
    environment:
      - TZ=Europe/Berlin
    depends_on:
      - redis

  redis:
    image: redis:alpine
    volumes:
      - ./redis:/data
    expose:
      - 6379
    restart: unless-stopped
    environment:
      - TZ=Europe/Berlin
TZ, volumes and<PORT> to suit your setup.
How does it work? #
Users and access control are configured in configuration.yml and users_database.yml, both available in ./config/.
First you need to build your users_database.yml, setting up your first user.
# Creating users_database.yml
cd /path/to/authelia/config
vim users_database.yml

# Generating password hash for first user (define a secure password for <'SOMEPASSWORD'>)
docker run --rm authelia/authelia:latest authelia hash-password 'SOMEPASSWORD'
Configure your first user in users_database.yml.
---
###############################################################
#                         Users Database                      #
###############################################################

# This file can be used if you do not have an LDAP set up.

users:
  test-user:
    displayname: "Tester"
    password: "$argon2id$v=19$m=65536,t=3,p=4$4oI0bY5UJg2tzvWamPcipA$hVTeFKR2hM1i103Cw2yd+AS1ethwBgCX8FqzpizAcOU"   #hash using docker run --rm authelia/authelia:latest authelia hash-password 'SOMEPASSWORD'
    email: tester@domain.tld
#    groups:
#      - admins
...
Set your services up for access control in configuration.yml.
vim /path/to/authelia/config/configuration.yml

access_control:
  default_policy: deny
  rules:
    # Rules applied to everyone
    # - domain: public.example.com
    #  policy: bypass
    - domain: service_1.domain.tld
      policy: one_factor
    - domain: service_2.domain.tld
      policy: two_factor
    - domain: service_3.domain.tld
      policy: bypass
docker-compose restart.
Once configured all you have to do is edit the advanced configuration of the Proxy Host in Nginx Proxy Manager, use the following example:
Click for advanced NPM proxy host configuration ...
location /authelia {
  internal;
  set $upstream_authelia http://<IP-ADDRESS>:<PORT>/api/verify; #ADD YOUR IP AND PORT OF AUTHELIA
  proxy_pass_request_body off;
  proxy_pass $upstream_authelia;
  proxy_set_header Content-Length "";

  # Timeout if the real server is dead
  proxy_next_upstream error timeout invalid_header http_500 http_502 http_503;
  client_body_buffer_size 128k;
  proxy_set_header Host $host;
  proxy_set_header X-Original-URL $scheme://$http_host$request_uri;
  proxy_set_header X-Real-IP $remote_addr;
  proxy_set_header X-Forwarded-For $remote_addr;
  proxy_set_header X-Forwarded-Proto $scheme;
  proxy_set_header X-Forwarded-Host $http_host;
  proxy_set_header X-Forwarded-Uri $request_uri;
  proxy_set_header X-Forwarded-Ssl on;
  proxy_redirect  http://  $scheme://;
  proxy_http_version 1.1;
  proxy_set_header Connection "";
  proxy_cache_bypass $cookie_session;
  proxy_no_cache $cookie_session;
  proxy_buffers 4 32k;

  send_timeout 5m;
  proxy_read_timeout 240;
  proxy_send_timeout 240;
  proxy_connect_timeout 240;
}

  location / {
      set $upstream_<service> http://<IP-ADDRESS>:<PORT>;  #CHANGE NAME OF UPSTREAM AND IP-ADDRESS AND PORT
      proxy_pass $upstream_<service>;  #CHANGE NAME OF UPSTREAM

  	auth_request /authelia;
  	auth_request_set $target_url $scheme://$http_host$request_uri;
  	auth_request_set $user $upstream_http_remote_user;
  	auth_request_set $groups $upstream_http_remote_groups;
  	proxy_set_header Remote-User $user;
  	proxy_set_header Remote-Groups $groups;
  	error_page 401 =302 https://auth.domain.tld/?rd=$target_url; #CHANGE TO AUTHELIA DOMAIN

  	client_body_buffer_size 128k;

  	proxy_next_upstream error timeout invalid_header http_500 http_502 http_503;

  	send_timeout 5m;
  	proxy_read_timeout 360;
  	proxy_send_timeout 360;
  	proxy_connect_timeout 360;

  	proxy_set_header Host $host;
  	proxy_set_header X-Real-IP $remote_addr;
  	proxy_set_header X-Forwarded-For $proxy_add_x_forwarded_for;
  	proxy_set_header X-Forwarded-Proto $scheme;
  	proxy_set_header X-Forwarded-Host $http_host;
  	proxy_set_header X-Forwarded-Uri $request_uri;
  	proxy_set_header X-Forwarded-Ssl on;
  	proxy_redirect  http://  $scheme://;
  	proxy_http_version 1.1;
  	proxy_set_header Connection "";
  	proxy_cache_bypass $cookie_session;
  	proxy_no_cache $cookie_session;
  	proxy_buffers 64 256k;

  	set_real_ip_from 192.168.178.0/24;
  	real_ip_header X-Forwarded-For;
  	real_ip_recursive on;

  }
<IP-ADDRESS>, <PORT>, upstream_<service> and https://auth.domain.tld to values suitable for your setup.
Access control #
Authelia allows for a in depth access control which among other things lets you bypass certain subdirectories of your URL.
This is needed when the application you’re securing via Authelia publishes API endpoints for e.g. mobile apps.
Configure access control in the configuration.yml by adding two entries for your domain.
The first entry adds a bypass rule for subdirectories starting with /api and /login while the second entry activates 2FA for the whole domain.
vim /path/to/authelia/config/configuration.yml

access_control:
  default_policy: deny
  rules:
    - domain: example.domain.tld
      resources:
       - '^/api/.*$'
       - '^/api$'
       - '^/api/'
       - '^/login/.*$'
       - '^/login$'
       - '^/login/'
      policy: bypass
    - domain: example.domain.tld
      policy: two_factor
Authelia’s Access Control has way more capabilities than that, check out the official documentation if you want to know more.
Final thoughts #
Authelia is a great way to add an extra layer of security to your applications. It’s easy to set up, lightweight and fast giving you the opportunity to set up your first portal in a matter of minutes. There is no reason you should wait, go ahead and give it a try.
Please consider leaving a ⭐ on the Authelia GitHub Repository if you love it as much as I do

