
We already talked about the risk of making your services accessible to the internet and how to
add a layer of security to your public services with Authelia.
While Authelia without a doubt makes things more secure it doesn’t change the fact that you’re opening up to the internet.
To be on the safe side I’ll always recommend a VPN first policy, and I’d like to present a simple solution - WireGuard.
What is WireGuard? #
WireGuard is a modern VPN solution which aims to be simple, easy to use and fast while maintaining state-of-the-art cryptography.
VPNs are created simply by exchanging public keys, no further management required.
Installation (Ubuntu) #
Enable IP Forwarding #
First you need to enable IP Forwarding on your server by uncommenting (removing the #) the line net.ipv4.ip_forward=1
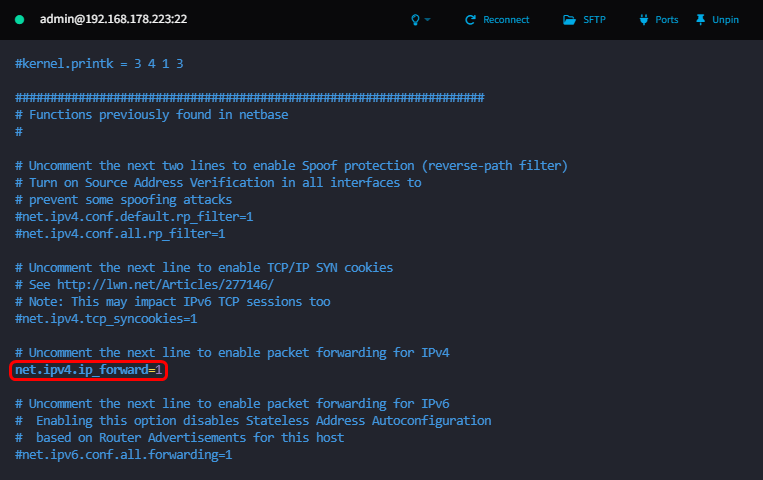
net.ipv4.ip_forward=1
sudo sysctl -p
Enable TUN device on Proxmox LXC #
For WireGuard to work on a Proxmox Ubuntu LXC we need to activate the TUN device first.
sudo vim /etc/pve/lxc/<CONTAINER_ID>.conf # Change `<CONTAINER_ID>` to the actual ID of your LXC.
Add the following lines to the end of the file.
lxc.cgroup.devices.allow: c 10:200 rwm
lxc.mount.entry: /dev/net dev/net none bind,create=dir
Change ownership of /dev/net/tun
sudo chown 100000:100000 /dev/net/tun
Installing WireGuard Server on Ubuntu LXC (22.04) #
WireGuard is available in the Ubuntu repository by default.
sudo apt update
We’re installing WireGuard via wireguard-install script, type your password when prompted.
wget git.io/wireguard -O wireguard-install.sh && bash wireguard-install.sh
Fill in your static public IP address or FQDN of your VPN server.

You can change WireGuard’s listening port or leave it at default.

This script automatically generates your first client as part of the setup process, give your first client a name.

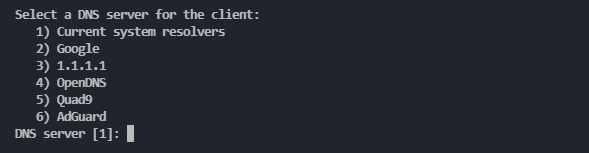
Choose which DNS server your client should use.
Finalize the installation wizard.

After the setup is finished, a QR code for your first WireGuard client will be presented and can be used in one of the mobile apps (
Android &
iOS )

Port Forwarding #
In order to make your WireGuard VPN Service reachable from the internet you need to forward the port you defined in the installation process (by default this is UDP/51820) to the local IP address of your server.
The way you do this depends on your router, just google something like
port forwarding <ROUTER_MODEL>.
Adding Clients #
The installation process copied the script wireguard-install.sh in your home directory, use it to add or remove a client and remove WireGuard.
sudo bash wireguard-install.sh
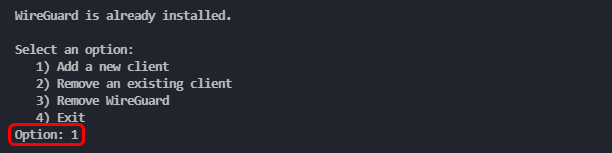
This way you can always repeat the client configuration steps we know from the initial installation process earlier.
Mobile devices (Android & iOS) #
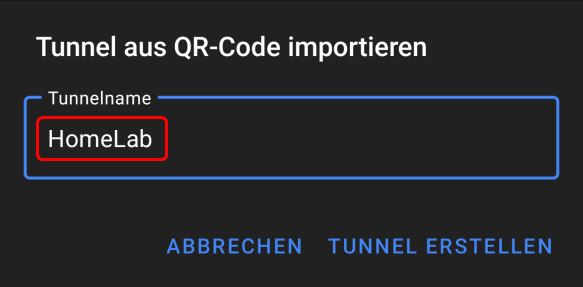
Once you created your client and obtained your QR code just open up the WireGuard app on your phone or tablet, add a new connection by clicking the blue + button and choose scan QR code.
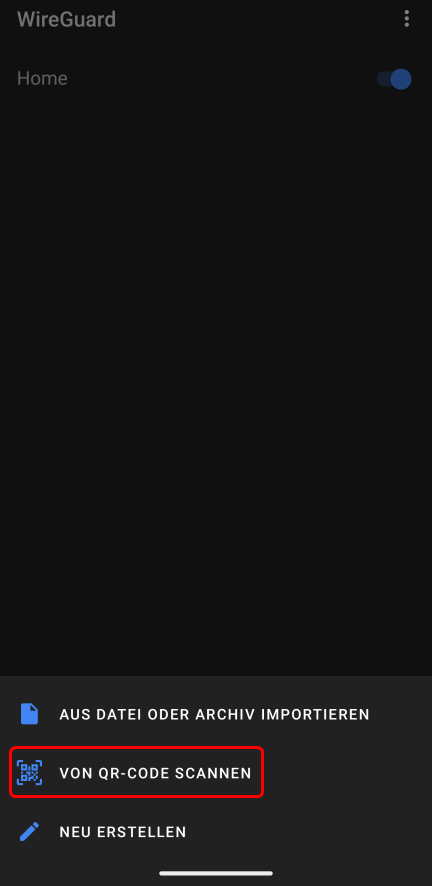
Fill in a name and create the tunnel.
Server devices (Ubuntu) #
Of course, you can use your WireGuard VPN with server devices too. I’m using this to connect my VPS to my private network for management and backup purposes.
First you need to install WireGuard on your machine.
sudo apt update && sudo apt upgrade -y
sudo apt install wireguard
With WireGuard installed you need to generate a public/private key pair for your client.
wg genkey | sudo tee /etc/wireguard/client_private.key | wg pubkey | sudo tee /etc/wireguard/client_public.key
Create the configuration file wg0.conf in the next step.
sudo vim /etc/wireguard/wg0.conf
And fill in your configuration.
[Interface]
## VPN client private IP address ##
Address = 10.7.0.x/24

## VPN client private key ##
PrivateKey = <Private Key>

[Peer]
## VPN server public key ##
PublicKey = <Public Key>

## VPN server public IP address and port ##
Endpoint = vpn.domain.tld:51820

## Route all the traffic through the VPN tunnel ##
AllowedIPs = 10.7.0.0/16

## Key connection alive ##
PersistentKeepalive = 15
Address: Set an IP address for your clientPrivateKey: Content of the earlier generated /etc/wireguard/client_private.keyPublicKey: Public key of the WireGuard server. Find it in one of the auto-generated client configuration files such as /root/phone.confEndpoint: URL of your public VPN endpoint.AllowedIPs: Define subnets to be routed via VPN.
Now connect to your WireGuard server for the server-side configuration of the client.
Edit /etc/wireguard/wg0.conf.
[Peer]
## Client public key ##
PublicKey = <Public Key>

## Client IP address ##
AllowedIPs = 10.7.0.x/32
PublicKey: Public key of the WireGuard client. Find it in /etc/wireguard/client_public.key on the client.AllowedIPs: Allow the exact VPN IP address of your VPN client.
After configuration is done, restart the VPN server
sudo systemctl restart wg-quick@wg0.service
and start the WireGuard interface on the VPN client
sudo systemctl start wg-quick@wg0
Testing VPN connection #
Once everything is set up and done there are a few ways of checking your VPN connection.
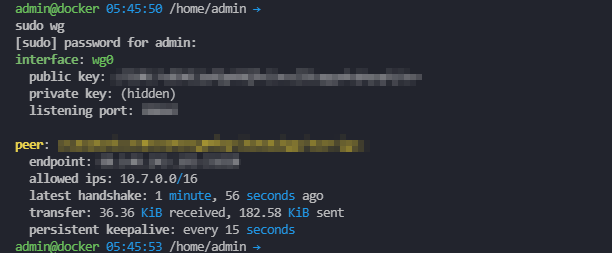
sudo wg shows all connected clients, their configuration and information about handshakes and data transfer.
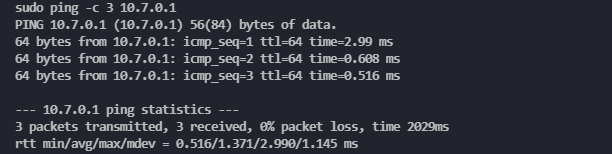
Executing simple ping tests between VPN client and server to ensure an established connection.
# Ping VPN server from a VPN client
sudo ping -c 3 10.7.0.1

# Ping a VPN client from VPN server
sudo ping -c 3 10.7.0.10
Final thoughts #
Hosting your own VPN to safely access your services without publishing them to the internet is the go-to. As long as you keep your private keys secure you’re safe from attacks outside your network.
WireGuard provides an easy “set-and-forget” way to establish secure connections while providing great performance.
Having all of my clients connected via VPN 24/7 restored a lot of my peace of mind, so what are you waiting for?
Don’t forget to leave a ⭐ on the WireGuard-Install GitHub Repo for providing such an easy way to install and manage your WireGuard environment.