
Nginx Proxy Manager is a tool for managing and configuring Nginx reverse proxies through a user-friendly web interface. It offers support for multiple domains, HTTPS/SSL certificates, and automatic Let’s Encrypt integration. Whether you are a technical user looking to set up and manage your own Nginx proxy server or a non-technical user looking for an easy way to get started with Nginx, Nginx Proxy Manager is a great choice.
Requirements #
- Public domain or at least a DynDNS domain (e.g. DuckDNS) pointing to your routers public interface
- Port Forwarding for HTTP (80/tcp) and HTTPS (443/tcp) Traffic
- Docker/Compose
Port Forwarding #
For your Reverse Proxy to work it is necessary that any http(s) traffic
(e.g. https://myservice.domain.tld) is pointed to the host you’re running Nginx Proxy Manager on. This requires a public domain or at least a Dynamic DNS domain pointing to the public interface (in other words your public IP Address) of your router. Now all you have to do is forwarding the ports 80/tcp and 443/tcp to the host of Nginx Proxy Manager.
The way you do this depends on your router, just google something like
port forwarding <ROUTER_MODEL>.
Installation #
Create a external docker network called reverse-proxy.
Adding our services and Nginx Proxy Manager to the same docker network later on makes sure, our Reverse Proxy can redirect to them without the need of exposing ports for every single service. More on that
later.
docker network create reverse-proxy
Create a installation directory for Nginx Reverse Proxy.
mkdir /opt/nginx-reverse-proxy
Generate the docker-compose.yml.
version: "3"
services:
  app:
    image: 'jc21/nginx-proxy-manager:latest'
    restart: unless-stopped
    container_name: nginx-proxy-manager
    ports:
      # These ports are in format <host-port>:<container-port>
      - '80:80' # Public HTTP Port
      - '443:443' # Public HTTPS Port
      - '81:81' # Admin Web Port
      # Add any other Stream port you want to expose
      # - '21:21' # FTP
    environment:
      DB_MYSQL_HOST: "db"
      DB_MYSQL_PORT: 3306
      DB_MYSQL_USER: "npm"
      DB_MYSQL_PASSWORD: "password"
      DB_MYSQL_NAME: "npm"
      # Uncomment this if IPv6 is not enabled on your host
      # DISABLE_IPV6: 'true'
    volumes:
      - /opt/nginx-proxy-manager/data:/data
      - /opt/nginx-proxy-manager/letsencrypt:/etc/letsencrypt
    depends_on:
      - db

  db:
    image: 'jc21/mariadb-aria:latest'
    restart: unless-stopped
    container_name: nginx-proxy-manager_db
    environment:
      MYSQL_ROOT_PASSWORD: 'root'
      MYSQL_DATABASE: 'npm'
      MYSQL_USER: 'npm'
      MYSQL_PASSWORD: 'password'
    volumes:
      - /opt/nginx-proxy-manager/data/mysql:/var/lib/mysql

networks:
  default:
    external:
      name: reverse-proxy
DB_MYSQL_PASSWORD / MYSQL_PASSWORD and MYSQL_ROOT_PASSWORD.The
networks block adds Nginx Proxy Manager to the earlier created docker network reverse-proxy.
Spin the container up with:
docker-compose up -d
docker-compose ps.In case of troubleshooting see the docker logs with:
docker logs nginx-proxy-manager.
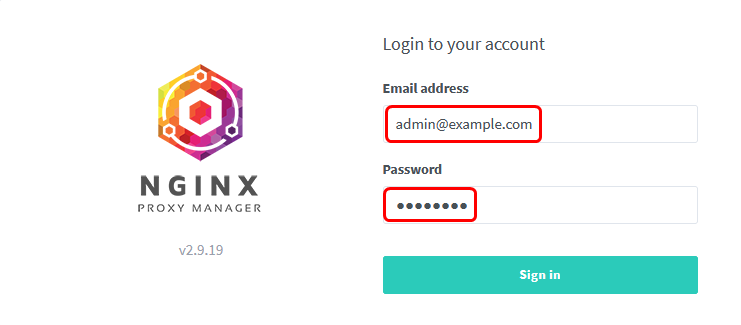
You now should be able to browse to http://<host_ip_address>:81 and log in with the default credentials:
Email:    admin@example.com
Password: changeme
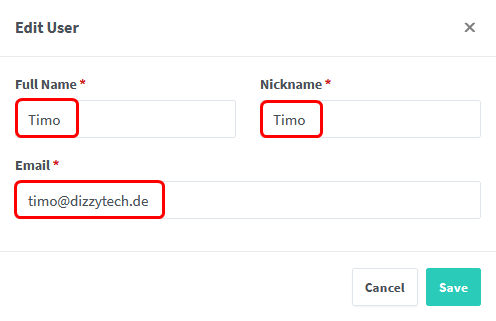
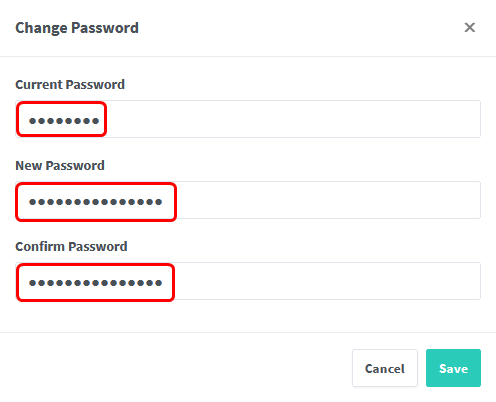
Right after your first login you’ll be requested to change your account details and set a new password.
You’re now able to start setting up your SSL certificates and create your first proxy hosts.
SSL Certificates #
Why are we using a Reverse Proxy in the first place?
We want to access our services in a secure and trusted way, this is where SSL Certificates come into play to help us keep user data secure by verifying ownership of a website and therefor preventing
Man-in-the-middle attacks.
With Nginx Proxy Manager and its integrated Certbot you can either create SSL Certificates per Proxy Host (like service.domain.tld) or implement a single Wildcard Certificate which can be used for all Proxy Hosts within your domain (like *.domain.tld). Since having a dedicated SSL Certificate for every service you’re running can get quite messy with time I recommend using a much more convinient Wildcard Certificate.
Wildcard Certificate (Cloudflare) #
To do so we need to create an API Token from our DNS provider, in this case we are using Cloudflare.
Follow
this link to your Cloudflare profile and click on Create Token and create a Custom Token.
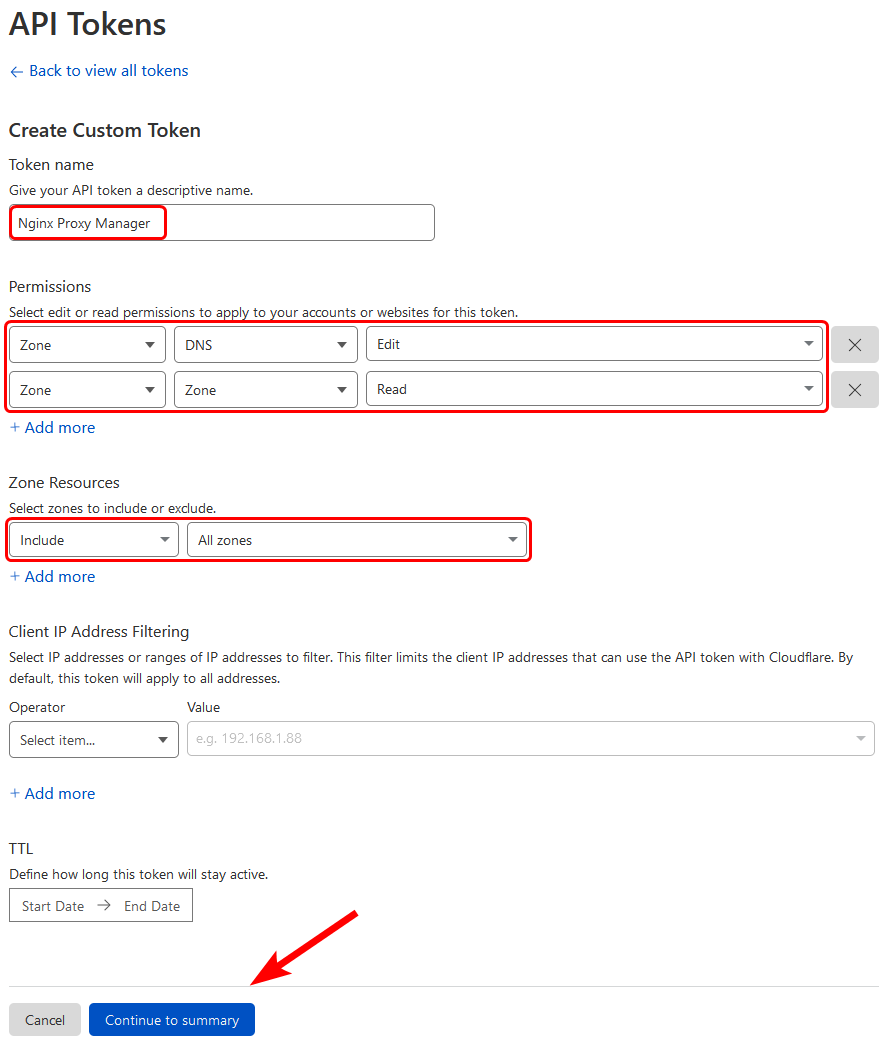
This should generate an API Token you can use for Nginx Proxy Manager to interact with your Cloudflare account.
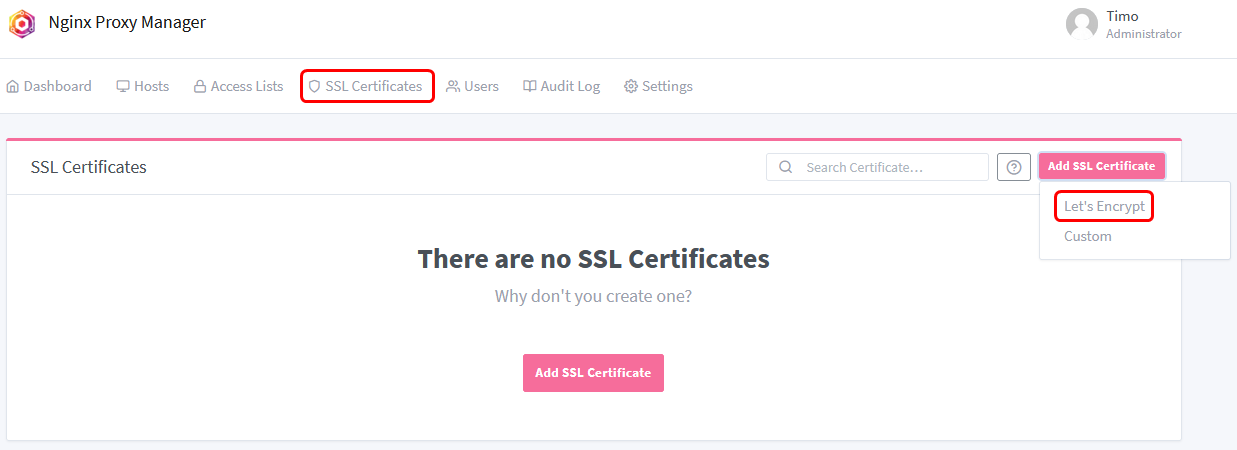
Now let’s create a Wildcard Certificate in Nginx Proxy Manager, to do so click Add SSL Certificate in the SSL Certificates tab.
Fill out all the necessary information and click on save.

This process can take a few minutes but if everything goes right your should be presented with your newly created Wildcard Certificate, which can be used for all future proxy hosts you create within your domain.

Restricting Access #
Since the majority of your services for security reasons should not directly be published to the internet Nginx Proxy Manager allows to implement Access Lists. With these Access Lists we can restrict access by defining IP Address Whitelists and Blacklists or forcing Authorization.
Before publishing your services to the internet check the following post about WireGuard, set up your own VPN and securely access your self-hosted services…
For your services to be reachable via a Proxy Host you need some kind of local DNS service pointing to Nginx Proxy Manager since you won’t create a public DNS record for them ( Pi-hole for example comes with local DNS too).
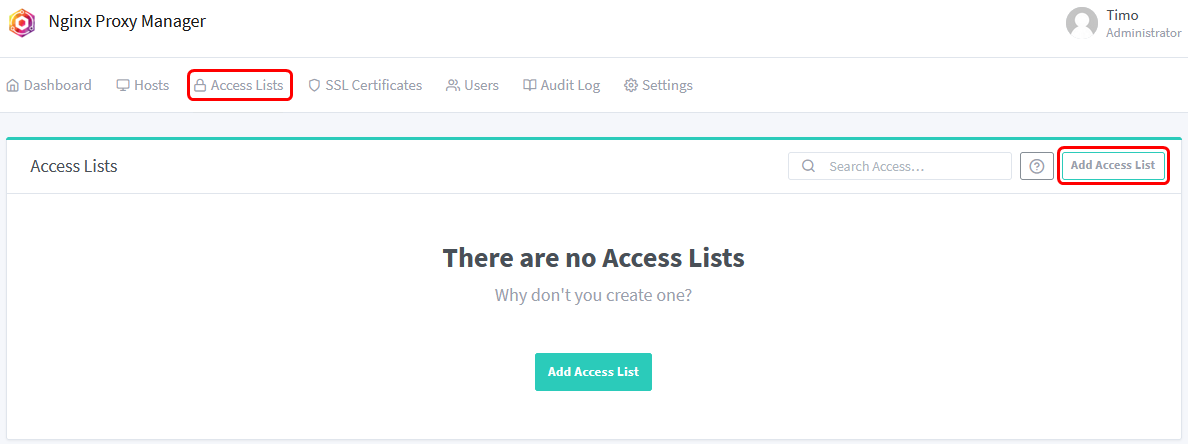
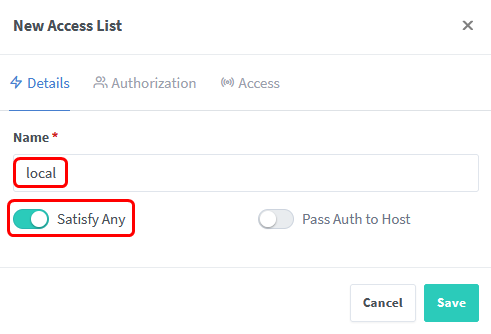
In this step we will create a Access List called local and therefor restrict access to local subnets by clicking on Add Access List in the Access Lists tab.
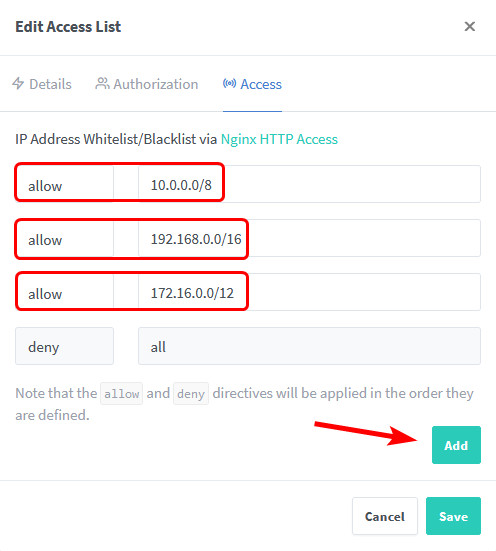
Fill in the details and whitelist the local subnets 10.0.0.0/8, 172.16.0.0/12 and 192.168.0.0/16.
You can now select this Access List when creating a Proxy Host.
Your first Proxy Host #
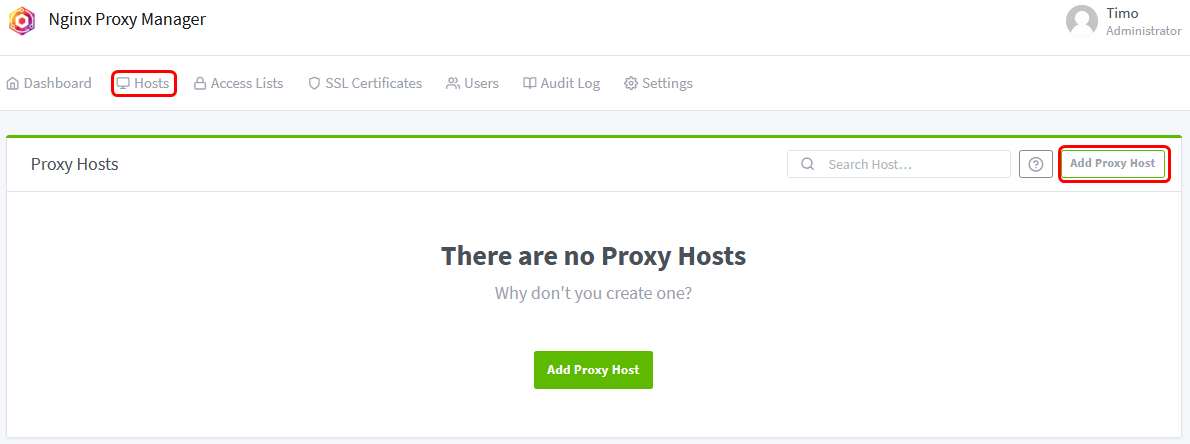
We can finally create our first Proxy Host, click on Add Proxy Host in the tab Hosts –> Proxy Hosts.
Define the Domain Name and the destination (Hostname / IP Address and Port of your service).
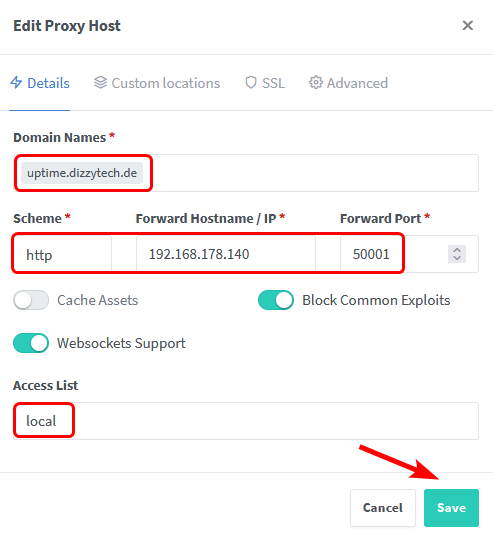
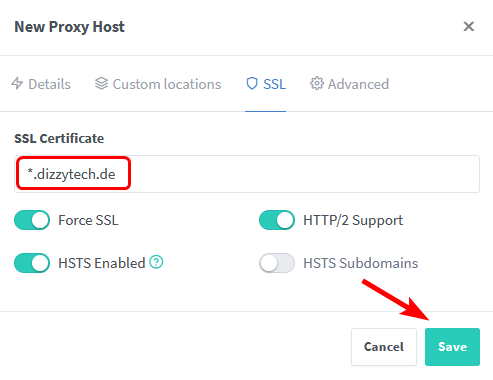
Select the SSL Certificate we created earlier and click on Save.
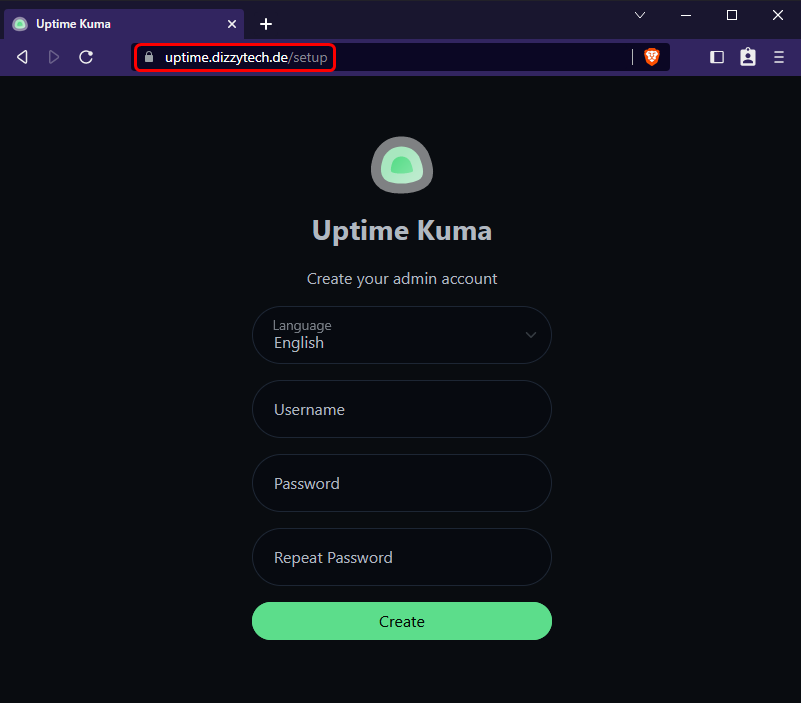
We should now be able to browse our service securely via the defined URL https://uptime.dizzytech.de.
Pro Tip #
As long as your instance of Nginx Proxy Manager and the service you want to create a Proxy Host for are running on the same host, you can join them in the same docker network and reach your service without the need of exposing ports.
To do so we have to join our service (in this case Uptime Kuma) the same docker network as Nginx Proxy Manager and comment out the port exposure.
Add the following code to join your service to the docker network called reverse-proxy:
networks:
 default:
   external:
     name: reverse-proxy
The finished docker-compose.yml should look something like this:
version: "3.8"

services:
  app:
    container_name: uptime-kuma
    image: louislam/uptime-kuma:1
    restart: unless-stopped
    volumes:
      - uptime-kuma:/app/data
    # ports:
      # - "50001:3001"

volumes:
  uptime-kuma:
    driver: local

networks:
 default:
   external:
     name: reverse-proxy
container_name for your service too since this is the hostname Nginx Proxy Manager will be redirecting to.
Recreate the docker container with the following command:
docker compose up -d --force-recreate
container port you can always check with docker-compose ps or docker ps.
We can now adjust the Proxy Host for our service by entering the container_name as Forward Hostname / IP and the container port as Forward Port.
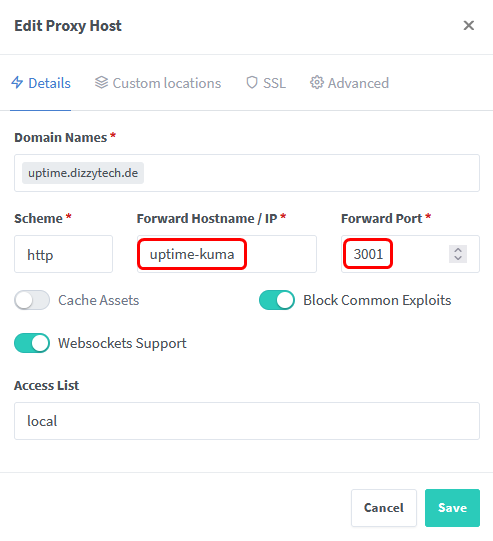
If everything works as expected you are now able to access your service without exposing any ports of the docker container.
Final Thoughts #
Besides Nginx Proxy Manager there are many popular Reverse Proxy services out there, for example
Traefik and
Caddy just to name a few.
The convinience of an easy-to-use Web GUI and the solid functionality never gave me a reason to consider changing to any other Reverse Proxy solution.
Nginx Proxy Manager is beginner-friendly and doesn’t leave you hanging even when your requirements might get more advanced, it’s all in all a great choice.
Consider leaving a ⭐ at the GitHub Repo if you like Nginx Proxy Manager.