
Paperless-ngx is a Document Management System (DMS) that transforms your documents into a digitalized and searchable database.
It’s a fork of
Paperless-ng and a demo is available at
demo.paperless-ngx.com using login demo / demo.
Benefits using a DMS #
Every contract, bank account or purchase generates lots of digital and physical documents nowadays.
To stay on top of your important documents a Document Management System helps you with organizing them in one place and providing you with a searchable database.
A quick overview of the most important pros:
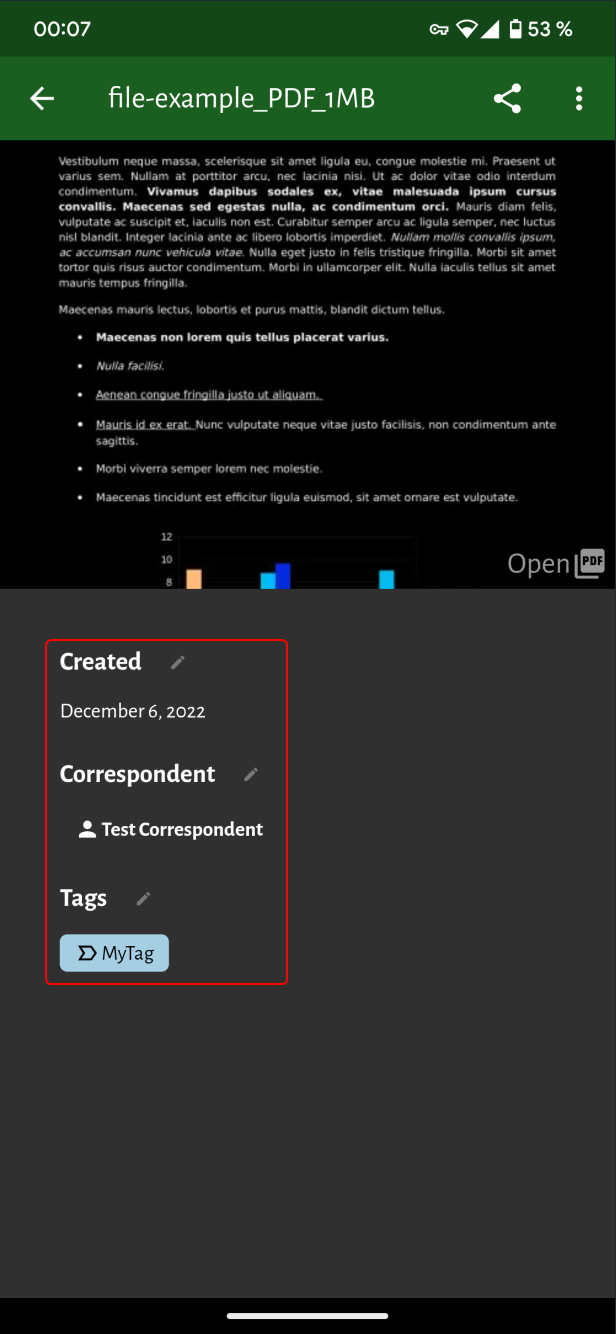
- Define metadata such as
Tag,Document TypeorCorrespondent. - Comprehensive search (OCR) to easily find any document.
- All documents in one place.
- Reduces the amount of physical documents.
How does it work? #
There are multiple ways of how you can effectively use Paperless-ngx.
The Web UI can be used on both, desktop and mobile devices and gives you all possibilities to search and view or upload documents. If you want to manage your documents on the go, there are
Mobile Apps for Android and iOS available.
An App allowing you to share any documents with paperless.
Check out the Official Wiki for more details on all supported ways to upload your documents.
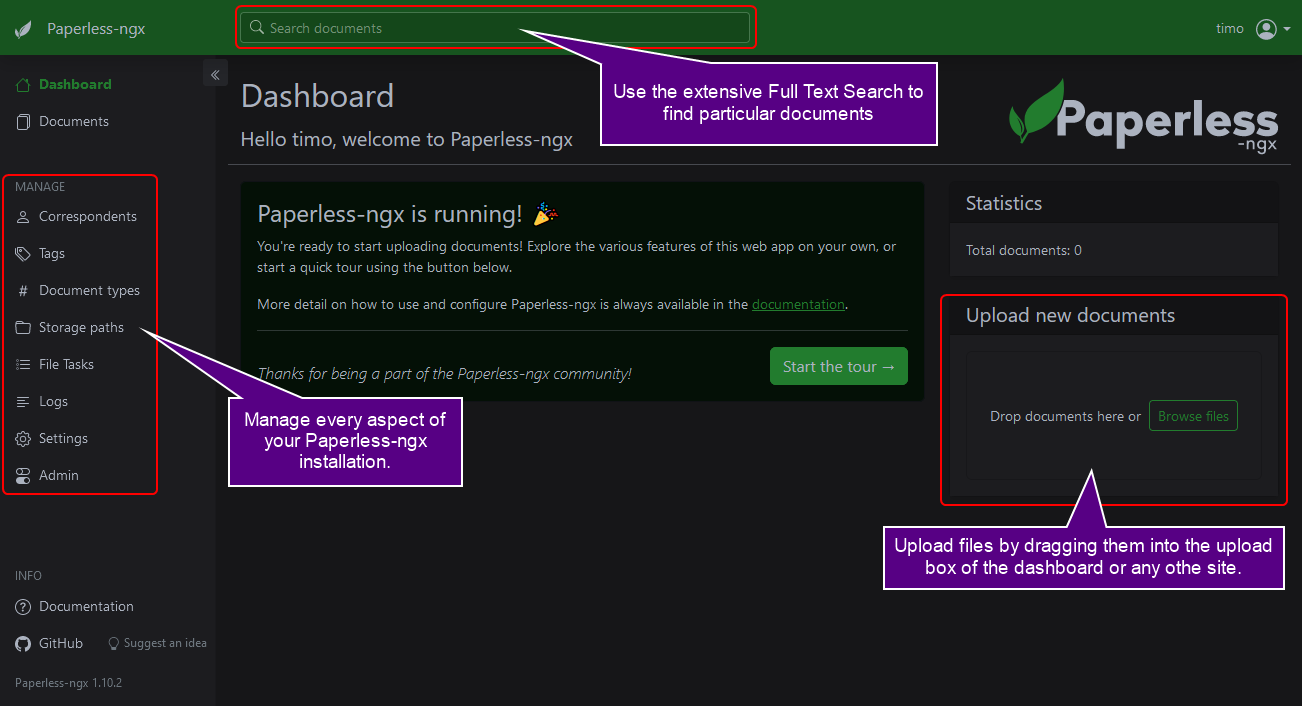
Web UI #
Once Paperless-ngx is successfully installed, the Web UI is available via
https://paperless.domain.tld (URL depending on your configuration, more on that later).
From there you have full access to all of its features, like uploading documents, managing your setup or using the full text search.
Mobile Apps #
Wouldn’t it be great to have full access to every important document even when no computer is around? Just install the mobile app (available for Android and iOS) and you’re good to go.
Upload documents right from your phone.
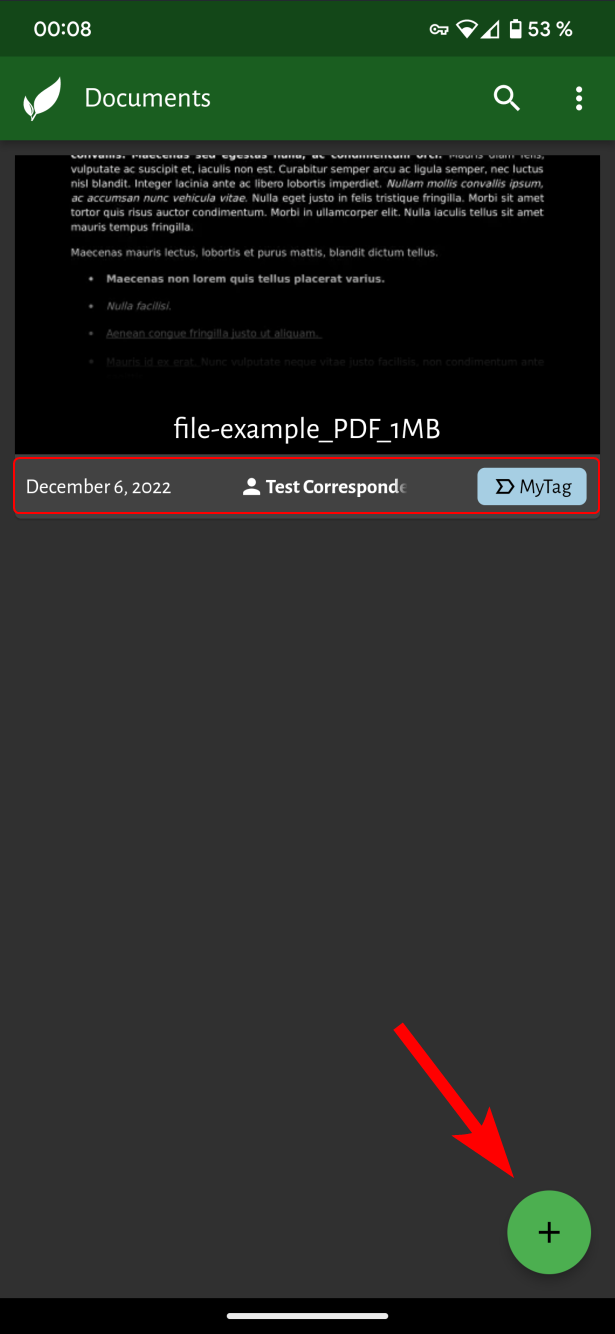
View or edit documents.
As a bonus for Android users there is
another app available which helps you to instantly share documents with your Paperless-ngx installation.

Check the following post about WireGuard, set up your own VPN and securely access your self-hosted services…
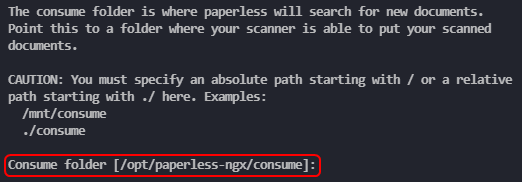
Consumption Directory #
Paperless-ngx offers automation via a consumption directory, any file placed in that folder will be automatically imported by Paperless-ngx.
Set your scanners (
Supported Devices/Software ) destination to the consumption directory to create an automatic workflow.
consumption folder keep in mind, that iNotify is not working to automatically detect file system changes.For the automatic consumption of documents to work,
Polling has to be configured. You can find more information on that in the
Configuration section.
Installation #
Paperless-ngx can be installed as Docker Container or directly on your system (bare metal), check this link for details on all available setup paths.
Docker Script #
The easiest way to install your brand-new instance of Paperless-ngx is via the provided Installation Script.
Create the installation directory and execute the installation script.
mkdir /opt/paperless-ngx && cd /opt/paperless-ngx
bash -c "$(curl -L https://raw.githubusercontent.com/paperless-ngx/paperless-ngx/main/install-paperless-ngx.sh)"
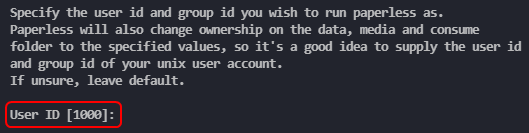
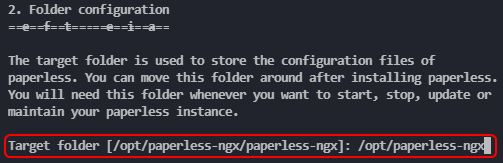
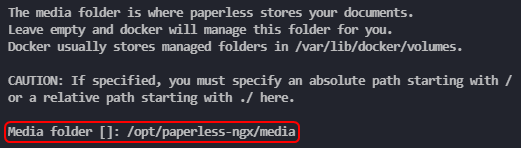
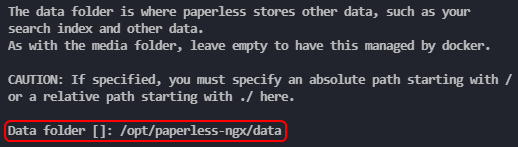
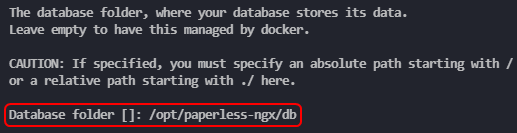
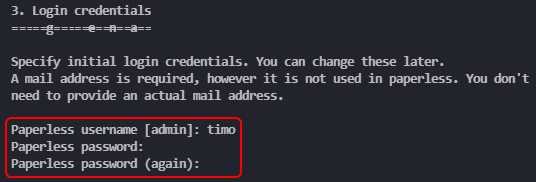
Now follow these installation steps:


Apache Tika and Gotenberg to support Office documents work out of the box.Find more details on fixing this issue in the Important notes section.
Configuration #
As a final step edit the configuration to your liking by editing the
docker-compose.env (see example below).
(Check this link for an overview of available configuration parameters.)
vim docker-compose.env
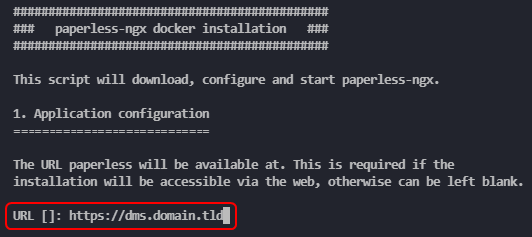
# Set the base url of your installation
PAPERLESS_URL=https://paperless.domain.tld
# Set your Timezone
PAPERLESS_TIME_ZONE=Europe/Berlin
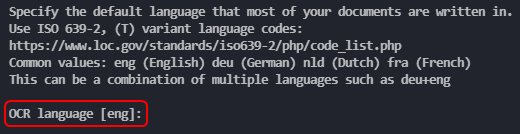
# Set your default OCR language
PAPERLESS_OCR_LANGUAGE=eng
# Paperless-ngx Secret Key
PAPERLESS_SECRET_KEY=<KEY>
# Set Filename Format
PAPERLESS_FILENAME_FORMAT={created_year}/{correspondent}/{title}
# Enable Polling in case your consumption directory is a NFS share.
PAPERLESS_CONSUMER_POLLING=1
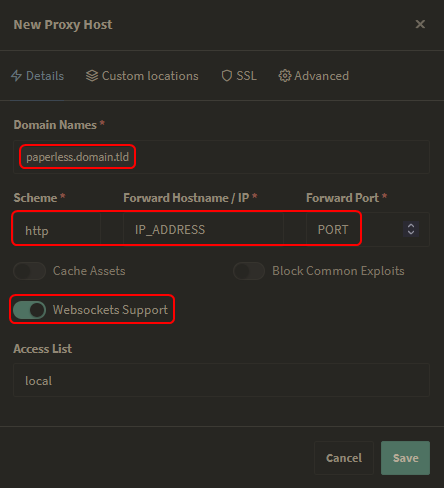
Nginx Proxy Manager #
Set up a Proxy Host pointing to the IP_ADDRESS and PORT of your Paperless-ngx web server.

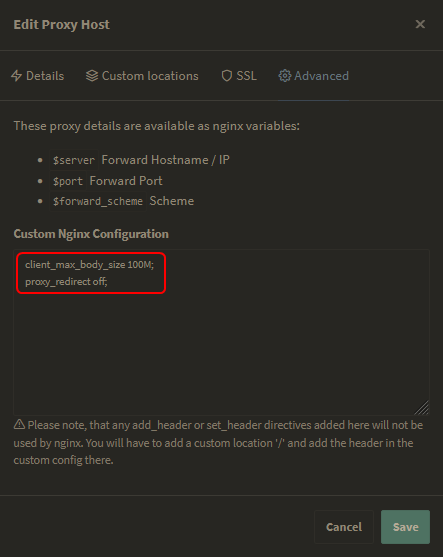
Advanced tab.)
# Set upload limit to 100 Megabyte.
client_max_body_size 100M;
proxy_redirect off;
Important Notes #
Besides PDF documents, images and plain text files, Paperless-ngx supports Office documents like Word, Excel, PowerPoint, and LibreOffice equivalents.
In order for Paperless-ngx to actually support Office documents you need to include Apache Tika and Gotenberg to your configuration (see
Installation via Docker script.)
gotenberg:7.6 is included in the official docker-compose.yml, file conversion is not working properly when using the latest versions (7.6 or 7.7) tho. See
Issue #2065 or
Issue #2116 for reference.
In order to fix these problems and make file conversion of Office documents work you need to use Gotenberg in version 7.4.
Do this by changing the line image: docker.io/gotenberg/gotenberg:7.6 to image: docker.io/gotenberg/gotenberg:7.4 in the docker-compose.yml, followed by the commands:
# Pull `gotenberg:7.4`
docker-compose pull

# Recreate the Paperless-ngx containers
docker-compose up -d --force-recreate
Final Thoughts #
Paperless-ngx seems to be one of the best Open-Source DMS solutions out there. It brings all the important features out-of-the-box, has a nice UI and a great user experience on both Desktop and Mobile Devices.
If you’re on the lookout for a solid DMS you should definitely give Paperless a try.
Don’t forget to check out the Paperless-ngx GitHub Repo and leave them a ⭐.